How to Jump Start a Car: The Complete Step-by-Step Guide (2026)
A dead car battery is one of the most common roadside emergencies and it almost always happens at the worst possible time. Maybe you left your headlights on overnight. Maybe the battery is just old. Whatever the reason, knowing how to jump start a car is a fundamental skill every driver should have.
The good news: jump starting a car is quick, straightforward, and takes under 10 minutes when done correctly. The bad news: doing it wrong can cause sparks, blow fuses, damage your vehicle’s electronics, or even injure you.
In this complete 2025 guide, you’ll learn:
- How to jump start a car using jumper cables (with a donor vehicle)
- How to jump start a car using a portable jump starter (no second car needed)
- The exact cable connection order and why it matters
- Critical safety tips and mistakes to avoid
- What to do if the car still won’t start after jumping
Let’s get your engine running.
What You’ll Need Before You Start
Before attempting a jump start, make sure you have the right equipment available.
Method 1: Jumper Cables + Donor Vehicle
- A set of heavy-duty jumper cables (at least 10–16 gauge, 10–20 feet long)
- A working vehicle with a fully charged battery of equal or greater voltage (12V for standard cars)
- Both vehicles parked close enough for cables to reach, but not touching each other
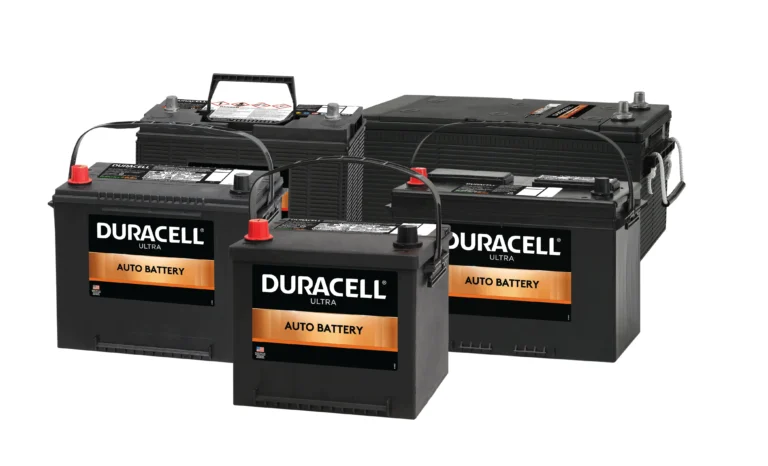
Method 2: Portable Jump Starter (Jump Pack)
- A fully charged portable jump starter with a CCA (Cold Cranking Amps) rating appropriate for your engine size
- No second vehicle required
Pro Tip: A portable jump starter (lithium jump pack) is the better option for most drivers. It’s self-contained, safer for beginners, and doesn’t require finding another vehicle. A quality unit costs $70–$150 and lasts years. Keep one in your trunk.
How to Jump Start a Car with Jumper Cables: Step-by-Step
This is the traditional method using a working vehicle’s battery to power up your dead one.
Safety First: Before You Begin
- Park both vehicles so the batteries are as close as possible, but ensure the cars do not touch each other. Front-to-front or side-by-side both work.
- Turn both ignitions off before connecting any cables.
- Set both vehicles in Park (automatic) or Neutral (manual) and engage the parking brakes.
- Turn off all electrical accessories headlights, radio, AC, and climate control — on both vehicles.
- Inspect both batteries for cracks, leaks, corrosion, or swelling. Never jump start a damaged or frozen battery. If the battery is visibly damaged, call a professional.
- Keep jumper cables away from moving engine parts, belts, and fans.
Step 1: Position the Vehicles
Park the donor vehicle (good battery) directly in front of, or alongside, the vehicle with the dead battery. The goal is to get the batteries as close together as possible so the jumper cables reach comfortably.
Make sure both cars are completely off and stationary before proceeding.
Step 2: Identify the Battery Terminals
Open both hoods. Locate the battery in each vehicle. Most car batteries are in the engine bay; some (like certain BMWs and Minis) have the battery in the trunk or under a seat — check your owner’s manual if you can’t find it.
Identify the two terminals:
- Positive (+): usually marked with a “+” symbol, often with a red cover or red cable attached
- Negative (−): usually marked with a “−” symbol, often with a black cable attached
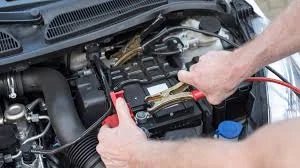
Step 3: Connect the Jumper Cables in the Correct Order
This is the most critical step. The connection order exists to prevent dangerous sparks near the battery, which can release flammable hydrogen gas.
Follow this exact sequence Red first, Black last on a ground:
| Step | Color | Action |
|---|---|---|
| 1 | 🔴 Red | Connect to positive (+) terminal on the DEAD battery |
| 2 | 🔴 Red | Connect to positive (+) terminal on the GOOD battery |
| 3 | ⚫ Black | Connect to negative (−) terminal on the GOOD battery |
| 4 | ⚫ Black | Connect to an unpainted metal surface on the dead car’s engine block or frame — NOT to the dead battery’s negative terminal |
Why connect the last black clamp to a metal ground instead of the negative battery terminal? Because connecting directly to the dead battery’s negative terminal risks creating a spark right next to the battery, where flammable hydrogen gas may be present. Grounding to the engine block is both safer and equally effective.
Memory tip: “RED dead, RED donor, BLACK donor, BLACK ground”
Step 4: Start the Donor Vehicle
Once cables are connected, start the vehicle with the good battery and let it run for 3–5 minutes. This allows the alternator to begin charging the dead battery through the cables.
For severely depleted batteries, allow the donor vehicle to run for 5–10 minutes before attempting to start the dead car.
Step 5: Try to Start the Dead Vehicle
After waiting, attempt to start the vehicle with the dead battery. Turn the key or press the start button normally.
If it starts: Great! Move immediately to Step 6.
If it doesn’t start:
- Double-check all four cable connections are secure (metal-to-metal contact)
- Wait another 5 minutes and try again
- If it still won’t start after 2–3 attempts, the battery may be beyond help, or there may be a separate issue (see “What If It Still Won’t Start?” below)
Step 6: Disconnect the Jumper Cables — in Reverse Order
Once the dead car is running, disconnect the cables in the exact reverse order of how you connected them:
| Step | Color | Action |
|---|---|---|
| 1 | ⚫ Black | Remove from the engine block ground on the previously dead car |
| 2 | ⚫ Black | Remove from the negative (−) terminal on the donor car |
| 3 | 🔴 Red | Remove from the positive (+) terminal on the donor car |
| 4 | 🔴 Red | Remove from the positive (+) terminal on the previously dead car |
Keep the cable clamps from touching each other or any metal surface during disconnection.
Step 7: Drive to Recharge the Battery
Do not turn off the engine. Jumper cables only provide enough power to start the engine — they do not fully recharge the battery. The car’s alternator will recharge the battery while the engine runs.
Drive for at least 20–30 minutes at highway speeds (not just idling) to give the alternator enough time to restore a healthy charge. Avoid short city trips immediately after a jump start.
Important: If the car dies again shortly after being jump started, or needs another jump within a few days, the battery is failing and needs to be replaced.
How to Jump Start a Car with a Portable Jump Starter
A portable jump starter (also called a jump pack or jump box) is a self-contained lithium battery pack that allows you to jump start your car without a donor vehicle. It’s faster, safer for beginners, and works anywhere.
Step 1: Check the Jump Starter’s Charge Level
Before you need it in an emergency, make sure your jump starter is fully charged. Most units have an LED indicator. A dead jump starter is useless — charge it every 3–6 months even if unused.
Step 2: Turn Off Your Vehicle
Make sure your car’s ignition is completely off before connecting the jump starter.
Step 3: Connect the Jump Starter Cables
Most portable jump starters use the same color-coded clamps as jumper cables:
| Step | Color | Action |
|---|---|---|
| 1 | 🔴 Red clamp | Connect to positive (+) terminal on the dead battery |
| 2 | ⚫ Black clamp | Connect to negative (−) terminal on the dead battery OR an unpainted metal ground |
Many modern jump starters feature spark-proof, reverse polarity protection — they’ll beep or flash a warning if you’ve connected the clamps incorrectly. This makes them significantly safer than traditional jumper cables.
Step 4: Turn On the Jump Starter
Switch on the jump starter unit (some activate automatically when clamps are connected). Wait 30–60 seconds for the pack to begin energizing the dead battery.
Step 5: Start Your Vehicle
Attempt to start your car normally. Most jump starters can start a car within 1–3 attempts. Don’t crank the engine for more than 3–5 seconds at a time — let it rest 30 seconds between attempts to avoid overheating the starter motor.
Step 6: Disconnect the Jump Starter
Once the car starts, disconnect in reverse order:
- ⚫ Black clamp first
- 🔴 Red clamp second
Turn off the jump starter unit and store it safely.
Step 7: Recharge Both Your Car Battery and the Jump Pack
Drive for 20–30 minutes to recharge your car’s battery via the alternator. Then, recharge your portable jump starter at home — most recharge via USB-C or a wall adapter in 2–4 hours.
Jumper Cables vs. Portable Jump Starter: Which Is Better?
| Feature | Jumper Cables | Portable Jump Starter |
|---|---|---|
| Requires another vehicle | ✅ Yes | ❌ No |
| Works alone | ❌ No | ✅ Yes |
| Risk of mistakes | Higher | Lower (built-in protections) |
| Cost | $15–$50 | $70–$150 |
| Ease of use | Moderate | Easy |
| Best for | Budget-conscious drivers | Most drivers |
| Works in remote areas | Only if help available | ✅ Yes |
Verdict: For most drivers, a portable jump starter is the smarter investment. A $80 jump pack handles a dead battery anywhere without requiring another vehicle. Jumper cables remain a useful backup if you already own them.
8 Common Jump Start Mistakes to Avoid
These errors can damage your car’s electrical system, create dangerous sparks, or prevent the jump start from working:
Mistake 1: Wrong Cable Connection Order
Connecting cables in the wrong sequence can create sparks near the battery and risk damaging your vehicle’s electronics. Always follow: Red dead → Red good → Black good → Black ground.
Mistake 2: Connecting Black Clamp to Dead Battery’s Negative Terminal
Attaching the final black clamp directly to the negative terminal of the dead battery can cause electrical sparks and poses a safety hazard. Always ground to the engine block instead.
Mistake 3: Letting Cable Clamps Touch Each Other
Once cables are connected to one terminal, keep the other clamps from touching any metal surface or each other — this causes short circuits.
Mistake 4: Jump Starting a Damaged or Frozen Battery
Frozen or visibly damaged batteries should never be jump started. At temperatures below 32°F (0°C), discharged batteries can freeze internally and potentially crack or explode during boosting attempts.
Mistake 5: Allowing Vehicles to Touch
If the two vehicles make metal-to-metal contact, it creates an unintended electrical connection that can cause serious damage.
Mistake 6: Turning Off the Engine Immediately After Jump Starting
Jumper cables do not charge the battery; they only provide enough power to start the engine. Once the car is running, the alternator charges the battery. In most cases, you’ll need to drive for 20–30 minutes or longer to restore a healthy charge.
Mistake 7: Using Undersized Cables
Thin, cheap jumper cables (over 10 gauge) may not carry enough current for larger engines — especially trucks, SUVs, or diesel vehicles. Use 10-gauge cables for most passenger cars; 6-gauge for trucks and larger vehicles.
Mistake 8: Jump Starting a Hybrid or EV with Standard Methods
Avoid using a hybrid or electric car as a donor vehicle, as this could cause damage. Hybrids and EVs have different electrical architectures. Check your owner’s manual before jump starting or using a hybrid/EV as a donor.
What If the Car Still Won’t Start After Jump Starting?
If you’ve followed all the steps correctly and the car still won’t start, here are the most likely causes:
1. Battery Is Completely Dead (Beyond Recovery)
Some batteries are so deeply discharged — or have been cycled so many times — that they can no longer hold a charge. A jump start will work momentarily, but the car dies again immediately. Solution: Battery replacement ($80–$200).
2. Faulty Alternator
If the car starts but dies within minutes of removing the cables, the alternator may not be charging the battery. Solution: Alternator test and possible replacement ($300–$700).
3. Corroded or Loose Battery Terminals
Heavy corrosion (white or blue powdery buildup) on battery terminals prevents good electrical contact. Clean terminals with a wire brush and baking soda solution, reconnect securely, and try again.
4. Bad Connection During Jump Start
Make sure all four clamps have solid metal-to-metal contact. Rubber, paint, or plastic under the clamp breaks the circuit.
5. Deeper Electrical Problem
A blown main fuse, failed starter motor, or damaged ECU may prevent starting regardless of battery power. At this point, professional diagnosis is needed.
6. The Problem Isn’t the Battery
If all lights and electronics work fine but the engine won’t turn over at all (no click, no crank), the issue may be a failed starter motor or ignition switch rather than a dead battery.
Signs Your Battery Needs Replacement (Not Just a Jump)
A jump start is a temporary fix. If any of these apply, replace the battery:
- Battery is 3–5+ years old
- You’ve needed more than one jump start in recent weeks
- Car starts after jumping but dies again quickly
- Engine cranks slowly even with a charged battery
- Battery failed a load test at an auto parts store
- Battery case is swollen, cracked, or leaking
Most auto parts stores (AutoZone, O’Reilly, Advance Auto Parts) offer free battery testing take advantage of it if your battery is showing any weakness.
Jump Starting Safety: Quick Reference Card
Save this or screenshot it for emergencies:
✅ SAFE JUMP START CHECKLIST

BEFORE:
□ Both cars OFF, in Park, parking brakes set
□ Check battery for damage, leaks, or freezing
□ Vehicles close but NOT touching

CONNECTION ORDER (Jumper Cables):
1. 🔴 Red → Dead battery POSITIVE (+)
2. 🔴 Red → Good battery POSITIVE (+)
3. ⚫ Black → Good battery NEGATIVE (−)
4. ⚫ Black → Engine block GROUND on dead car

START:
□ Run donor car 3–5 minutes
□ Try to start dead car
□ If no start: wait 5 more minutes, try again

DISCONNECT ORDER (reverse):
1. ⚫ Black from engine block
2. ⚫ Black from good battery
3. 🔴 Red from good battery
4. 🔴 Red from previously dead battery

AFTER:
□ Drive 20–30 minutes to recharge battery
□ Get battery tested if it was fully dead
Frequently Asked Questions
How long does it take to jump start a car?
The entire process takes 5–10 minutes when done correctly. Allow 3–5 minutes for the donor car to run before attempting to start the dead vehicle.
Can jump starting damage my car?
When done correctly, jump starting is safe for both vehicles. The most common cause of damage is incorrect cable order (reversed polarity), which can blow fuses or damage the alternator and ECU. Following the correct sequence eliminates this risk.
Can I jump start an automatic transmission car?
Yes. Automatic and manual transmission vehicles are jump started the same way. The only difference is that some manual cars can also be push-started (bump started) automatics cannot.
How long should I drive after a jump start?
Drive for at least 20–30 minutes at highway speeds. City driving and short trips don’t give the alternator enough time to fully recharge the battery.
Can one dead battery damage another car’s battery?
No. Jump starting does not damage the donor vehicle’s battery. The donor’s alternator simply shares power through the cables.
Can I jump start a car in the rain?
Yes, modern batteries are sealed and weather-resistant. Standard rain poses no significant risk during jump starting. Avoid jump starting if there is standing water around the vehicles or if the battery is visibly wet or damaged.
What if my battery is in the trunk, not the engine bay?
Some vehicles (BMWs, some Minis, and others) have the battery in the trunk or under a seat, but include jump start terminals in the engine bay specifically for this purpose usually marked with “+” and “−” symbols. Use those terminals; never run cables from the engine bay to the trunk.
Can I jump start an electric vehicle (EV)?
EVs do have a small 12V auxiliary battery (used for electronics and systems), which can technically be jump started the same way. However, the main traction battery that drives the vehicle cannot be jump started with jumper cables — it requires a specialized charger. Consult your owner’s manual.
Read: Why Is My Car Shaking?
Read: How Long Do Car Batteries Last?
Conclusion
Knowing how to jump start a car is one of the most practical skills a driver can have. Whether you’re using traditional jumper cables with a donor vehicle or a modern portable jump starter, the process is simple as long as you follow the correct steps and connection order.
Key takeaways:
- Always connect Red first, Black last and disconnect in reverse
- Never connect the final black clamp directly to the dead battery’s negative terminal use an engine block ground
- Drive for 20–30 minutes after jump starting to recharge the battery
- If the battery keeps dying, it needs to be replaced, not jumped again
- A portable jump starter is the most convenient and beginner-safe option
Keep a set of quality jumper cables or a charged portable jump starter in your vehicle at all times. It’s one of the simplest and most valuable items you can carry — and the one time you need it, you’ll be glad you have it.